Using Gtex-Letter (The User Interface)
- Table of Contents
- The Address Page
- The Opening Page
- The Contents Page
- The Filename Page
- The Makeup Page
The Address Page
When you first start gtex-letter, the programms opens with a welcome screen. Clicking the 'Next'-button, you get to the address-page:
Figure 2. The address page
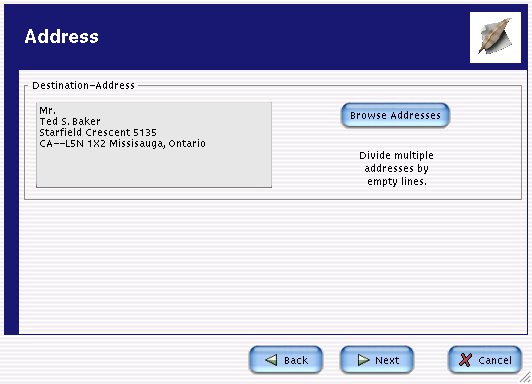
You can enter the address in the textfield on the left. Divide multiple addresses with an empty line to make a serial letter. (There is more info available on that). You can browse your gnome-card addressbook by clicking on the button 'Browse Addresses'.
The addressbook-dialog will only show the people that have either a postal address or a phone number. Email-only contacts will be hidden. Doubleclick to select an address and close the dialog. Otherwise click the 'okay'-button. Multiple addresses can be selected to make a serial letter. You can click on the head of every column to sort the list.
The Opening Page
By clicking the 'Next'-Button on the address page you access the opening page:
Figure 3. The opening page
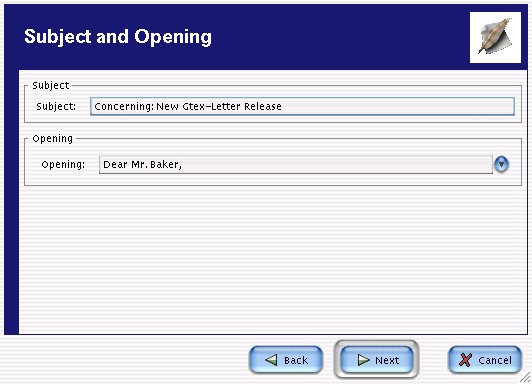
Here, you can set a subject for the letter. Notice, that this subject is optional. Then, a list of values provides you with standard-openings. If you have choosen an address from the address browser on the previous page, the standard-openings are adopted to the address choosen. However, this does not apply to serial letters, where a special format of the opening is displayed. (There is more info on this). You do not need to choose one of the standard openings. You can enter one by yourself. Please note, that entering an address by hand will not update the opening-buttons. Only selecting one from the addressbook will.
The Contents Page
Figure 4. The contents page
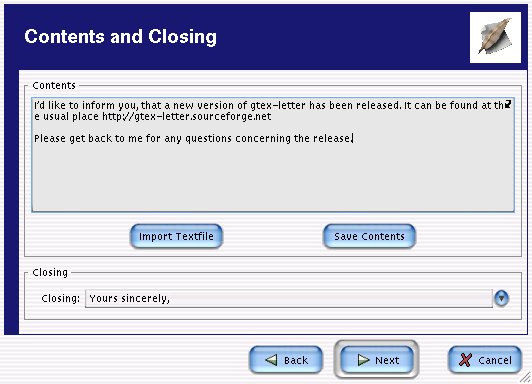
Enter your letter in the top textfield.
You can import an already written text by clicking the 'Import Textfile'-Button. If you want to save your contents for further use, click the 'Save Contents'. (Note that Gtex-letter saves your letter in the LaTeX-format. For future import of the text, it is easier to save it here.)
Choose an appropriate closing for your letter in the 'closing'-textfield. You do not have to choose one from the list. It is possible to enter your own closing.
The Filename Page
Figure 5. The filename page
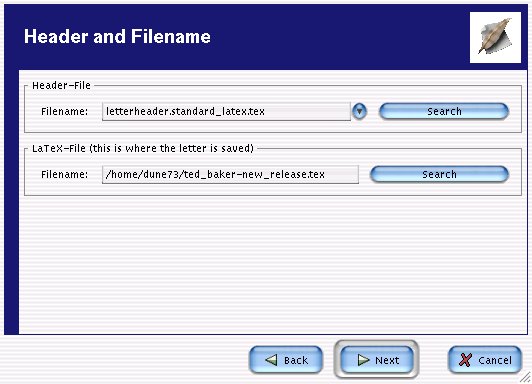
On this page you can choose a header for your letter and set a filename.
There is a list of predefined headers available. You can look for another header using the 'search'-button, that opens a file browser.
Gtex-letter will try and guess an appropriate filename for your letter. You can stick with that one or enter a different one. Click on the 'search'-button to open a file browser.
The Makeup Page
Figure 6. The Makeup page
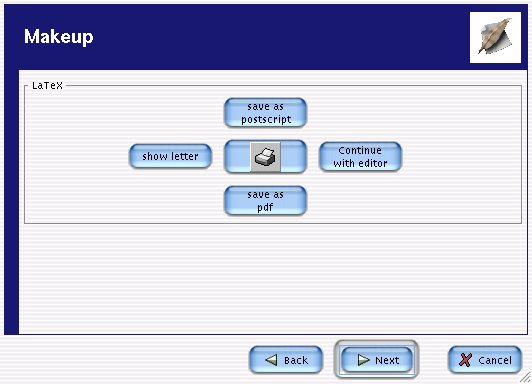
This page lets you preview, print and export your letter.
Click 'show letter' to get a preview. If you like the preview, you can print it by clicking on the printer icon. If you want to print it later, save it as a postscript. You can export the letter in the widely used Acrobat Format by clicking on 'save as pdf'.
At this point, gtex-letter has already saved your letter. The letter is saved in the the LaTeX-format. If you are used to LaTeX, you can edit the raw file using the button called 'continue with editor'.
The next and final screen of the programm is just a goodbye screen.